DHT22
Introducción
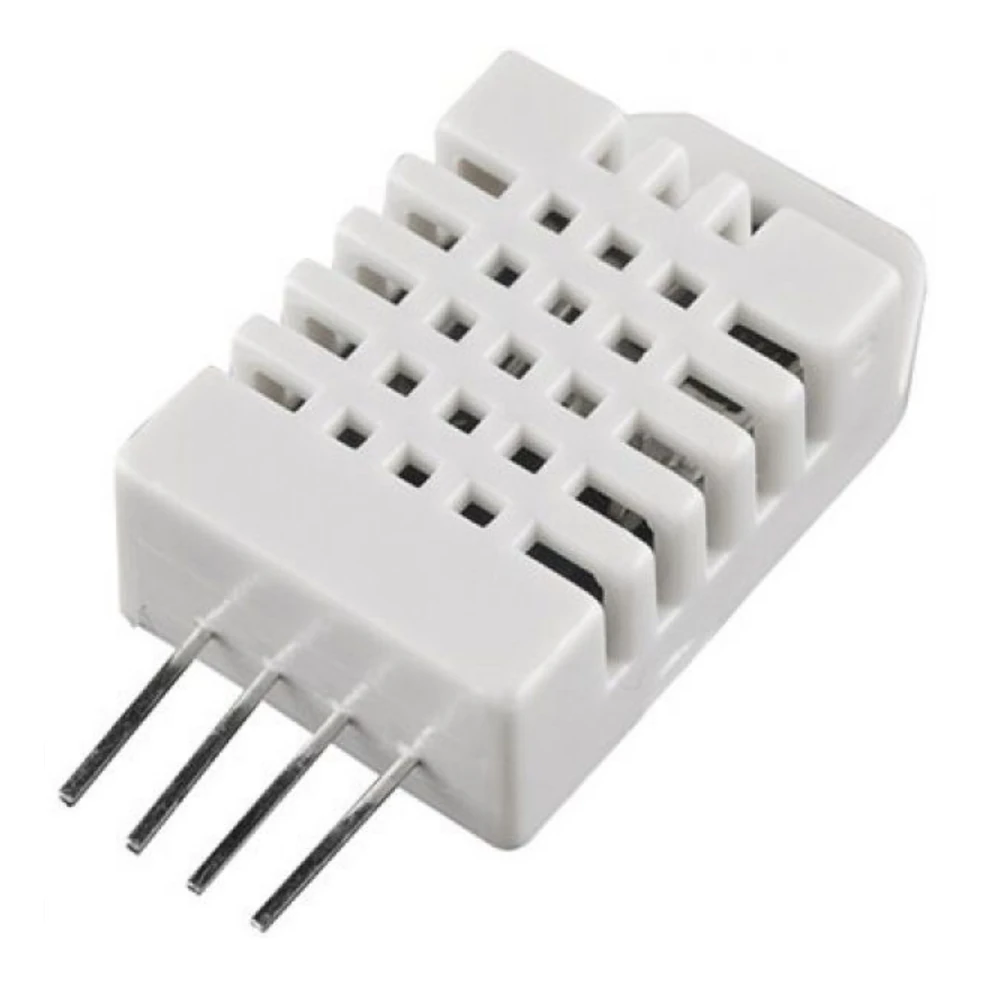
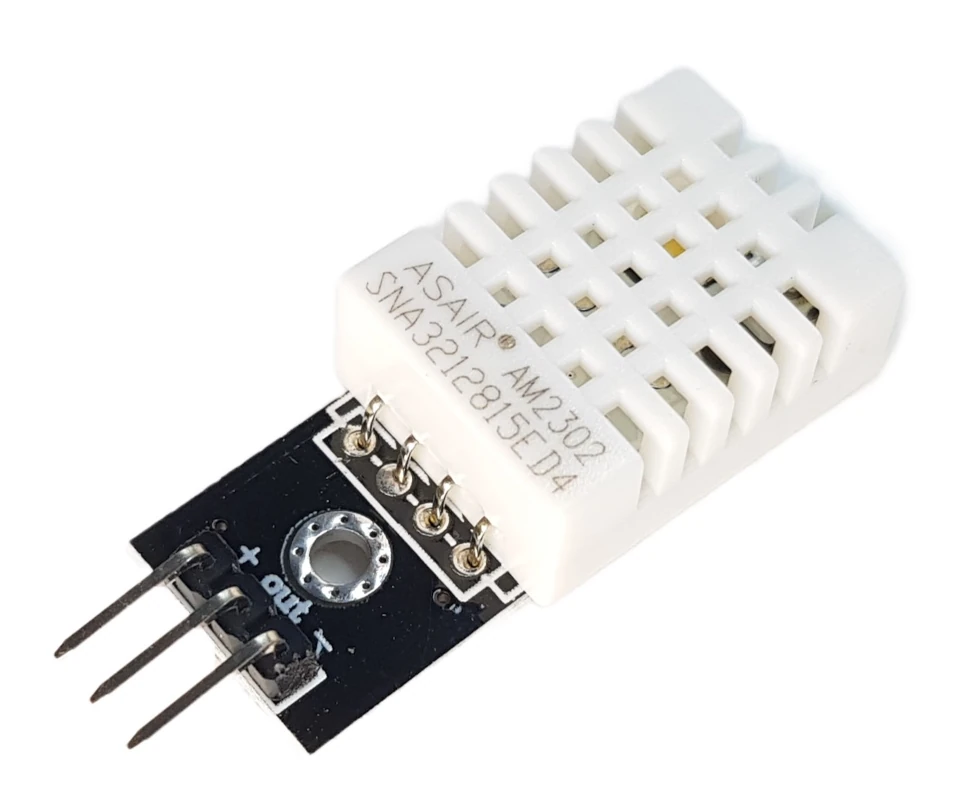
The DHT22 is a basic, low-cost digital temperature and humidity sensor. It uses a capacitive humidity sensor and a thermistor to measure the surrounding air and spits out a digital signal on the data pin (no analog input pins needed). It's fairly simple to use but requires careful timing to grab data. The only real downside of this sensor is you can only get new data from it once every 2 seconds.
📖 from adafruit
Specifications
- Low cost
- 3 to 5V power and I/O
- 2.5mA max current use during conversion (while requesting data)
- Good for 0-100% humidity readings with 2-5% accuracy
- Good for -40 to 80°C temperature readings ±0.5°C accuracy
- No more than 0.5 Hz sampling rate (once every 2 seconds)
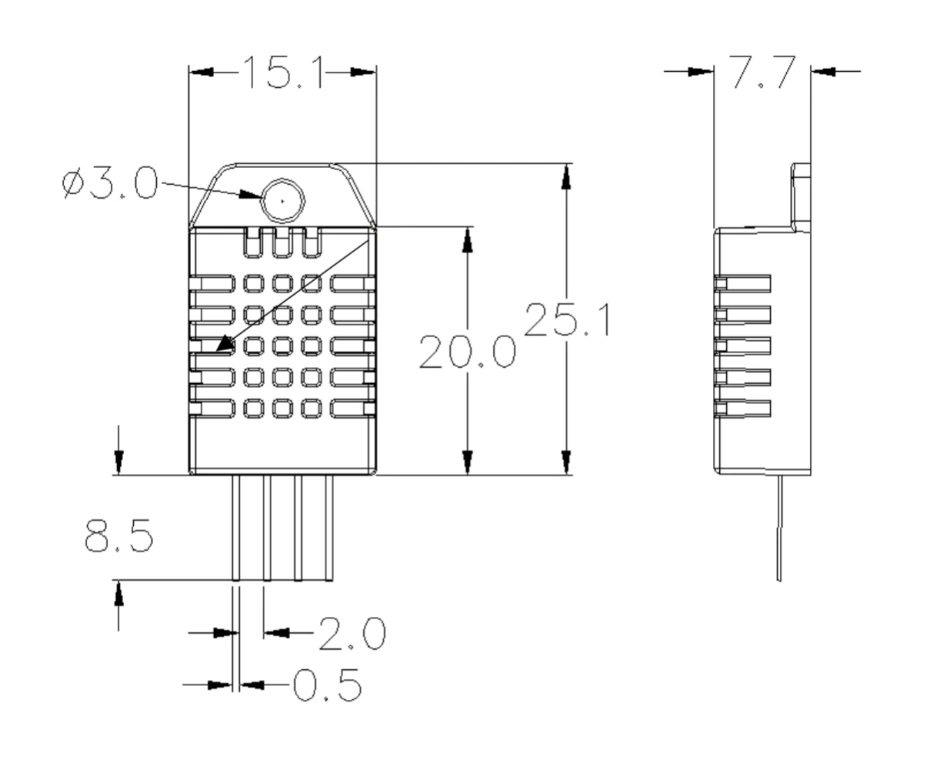
- Body size 27mm x 59mm x 13.5mm (1.05" x 2.32" x 0.53")
- 4 pins, 0.1" spacing
- Weight (just the DHT22): 2.4g
🧾 Hay mucha más información en el datasheet
DHT22 Temperature Sensor
Temperature Sensing is handled by the integrated NTC thermistor inside the DHT22 module. The NTC (Negative Temperature Coefficient) Thermistor is a resistor that has a negative proportion relationship with the temperature. The resistance of the NTC drops as the temperature increases and vice versa as indicated in the diagram below.
📖 from deepbluembedded


DHT22 Humidity Sensor
Humidity Sensing is handled by the internal humidity sensing component inside the DHT22 sensor’s module. The humidity sensing component in the DHT22 sensor utilizes a moisture-sensitive capacitor, which changes its capacitance based on the moisture level in the air.
The DHT22 sensor’s built-in microcontroller charges and discharges the moisture-sensitive capacitor and determines its capacitance by measuring the charging/discharging time. Then it converts the capacitance value into a digital signal, which is transmitted over a 1-Wire serial interface.
📖 from deepbluembedded
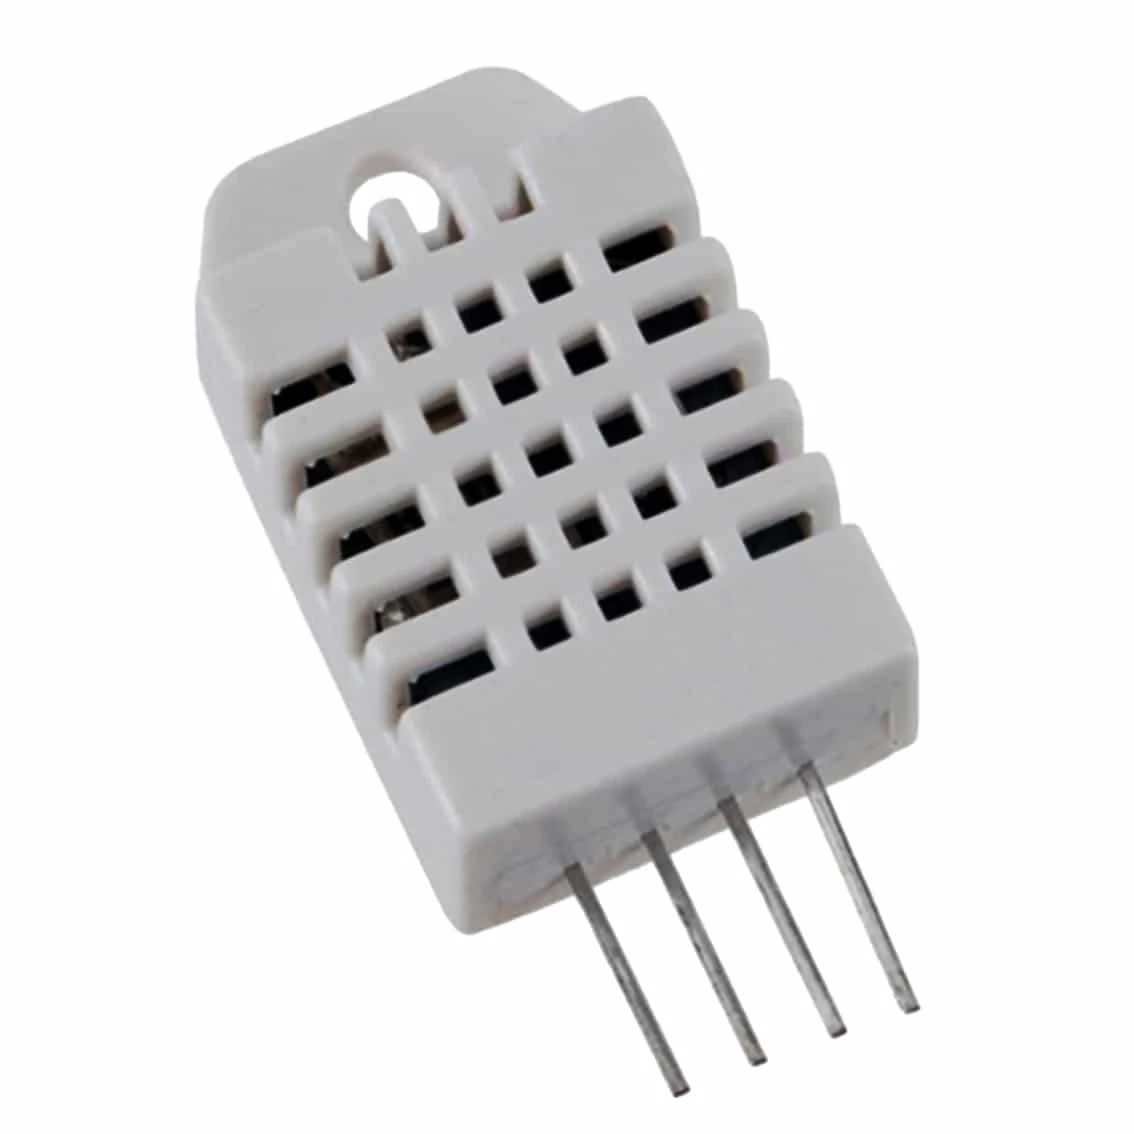
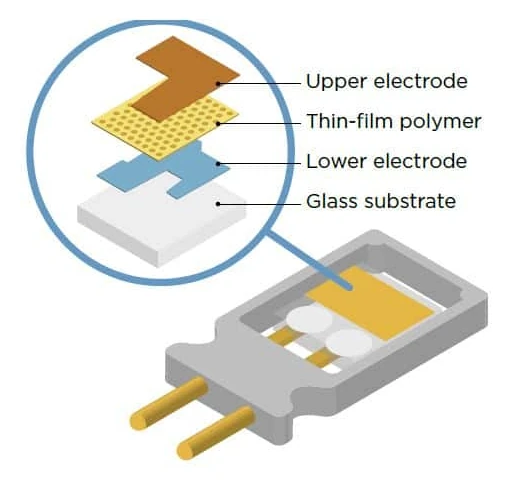
Obteniendo datos
Pinout
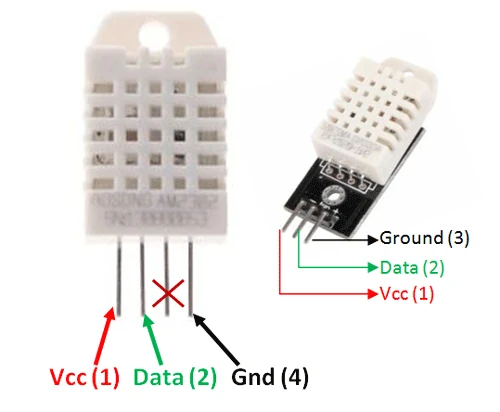
Sensor
| Nº | Nombre | descripción |
|---|---|---|
| 1 | VCC | Alimentación de 3.5v a 5.5v |
| 2 | Data | Output serial (temperatura y humedad) |
| 3 | NC | No conectar |
| 4 | GND | Ground |
Módulo
| Nº | Nombre | descripción |
|---|---|---|
| 1 | VCC | Alimentación de 3.5v a 5.5v |
| 2 | Data | Output serial (temperatura y humedad) |
| 3 | GND | Ground |
The only difference between the sensor and module is that the module will have a filtering capacitor and pull-up resistor inbuilt, and for the sensor you have to use them externally if required.
Circuito
El cirucito es muy sencillo solo necesitas conectar el pin VCC a 3.3v, GND y el pin de datos a un pin de tu elección (D4 en este caso.)

Librería
Para leer este sensor, podemos utilizar la librería DHT Sensor Library de adafruit. Esta librería requiere la instalación de la dependencia Adafruit Unified Sensor Driver, el Arduino IDE nos ofrecerá instalarla automáticamente.
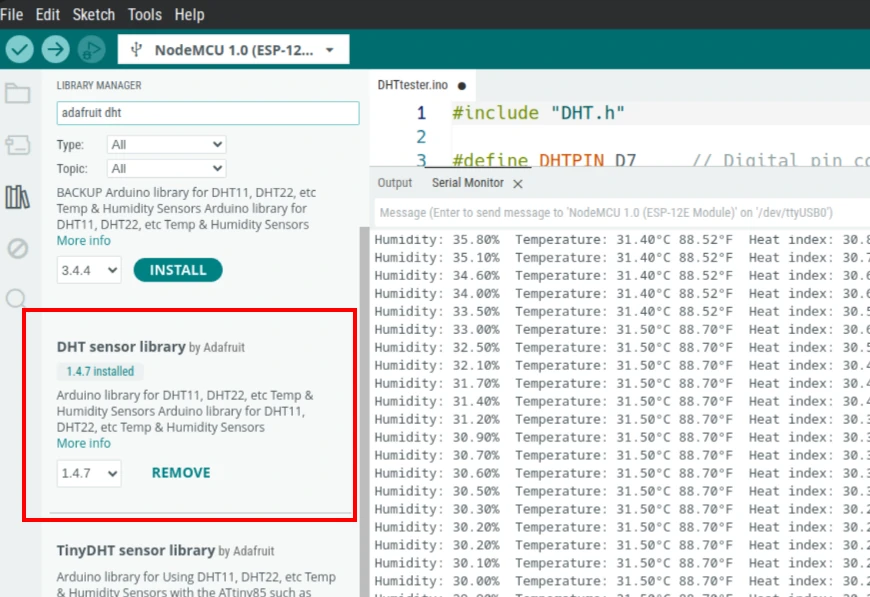
Para probar si nuestro sensor está bien conectado y todo funciona, podemos usar un simple código como este, recuerda poner el mismo pin en el que conectaste tu sensor y asegúrate de seleccionar el modelo adecuado (DHT11, DHT22, etc)
#include "DHT.h"

#define DHTPIN D4  // Digital pin connected to the DHT sensor
//#define DHTTYPE DHT11  // DHT 11
#define DHTTYPE DHT22   // DHT 22  (AM2302), AM2321
//#define DHTTYPE DHT21   // DHT 21 (AM2301)

DHT dht(DHTPIN, DHTTYPE);
long lastReading;

void setup() {
  Serial.begin(115200);
  dht.begin();
}

void loop() {
  if (millis() - lastReading > 3000) {
    lastReading = millis();
    float h = dht.readHumidity();
    float t = dht.readTemperature();
    Serial.print(F("Humidity: "));
    Serial.print(h);
    Serial.print(F("%  Temperature: "));
    Serial.print(t);
    Serial.println(F("°C "));
  }
}
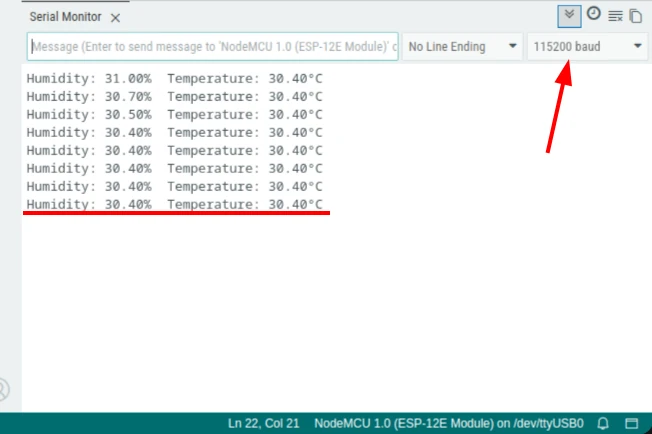
Si todo funciona bien, al abrir el Monitor Serial y seleccionar la velocidad adecuada, deberías de ver los datos del sensor!